Tools
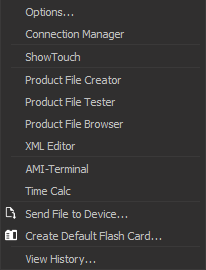
WinScript Live contains several tools that can assist you in your journey to creating the perfect script, as shown in Figure 1.
Options
The Options menu lets you set various settings for WinScript Live. See Options for details.
Connection Manager
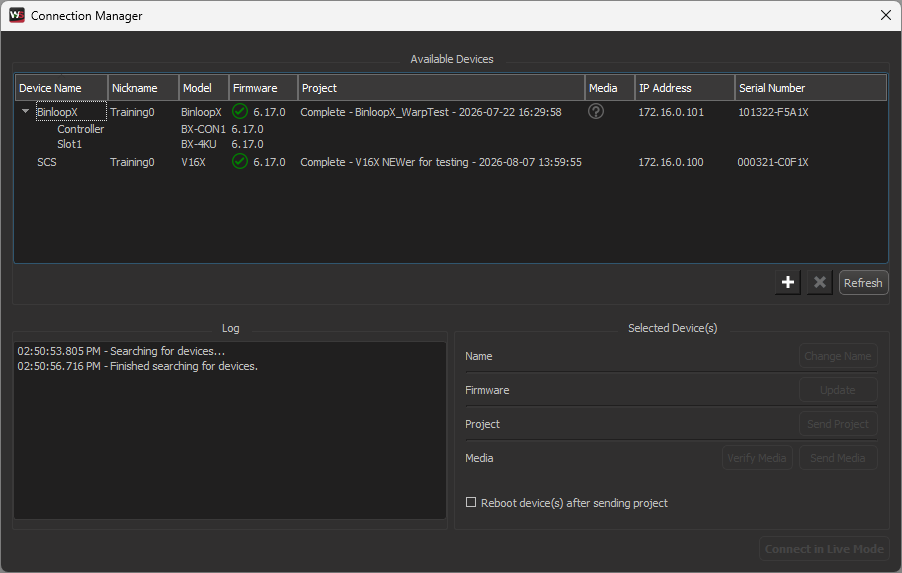
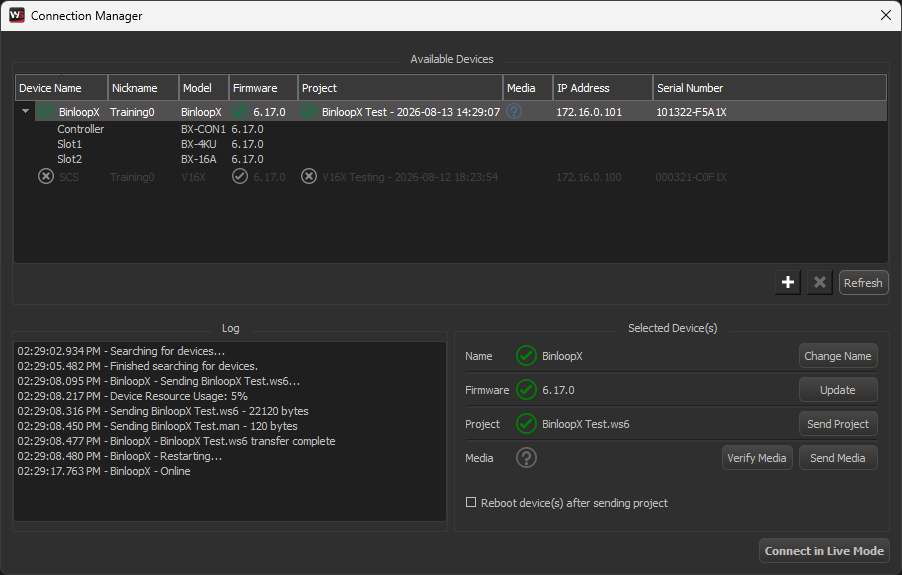
The Connection Manager is a powerful tool that lists any of our devices connected to your network and allows you to connect to, update the firmware of, and send and retrieve scripts or media from any of those devices, as shown in Figure 2.
Available Devices
The top section of the Connection Manager lists all devices on your network, along with their Device Name, Nickname, Model, Firmware version, Project with date and time of last edit, Media, IP Address, and Serial Number.
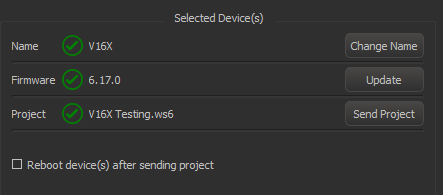
When a device is selected from the list, the fields listed below will populate in the Selected Device(s) section, as shown in Figure 3. Each field will either have a green checkmark or a red X. A red X next to any of these fields indicates a mismatch.
- Name: the name of the device. A green checkmark means the name of the device itself matches the name of the device in the script configuration.
- Firmware: the current firmware version on the device. A green checkmark means that the firmware on the device matches the software version of WinScript Live currently open.
- Project: the script currently loaded on the device. A green checkmark means the project currently loaded on the device matches the project currently open in WinScript Live.
Update Firmware
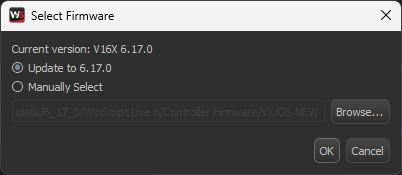
To update the firmware of a device on the network, select the device in the Available Devices section, then select the Update button to the right of the Firmware field. The Select Firmware dialog will appear as shown in Figure 4. You can either update to match the version of WinScript Live that is currently open, or select the Manually Select radio button to browse for a firmware file on your machine. See https://alcorn.com/firmware/ for firmware for all our products.
Send or Verify Media
If you have a script open for a device that can store media, like the BinloopX or the RidePlayerX, two options appear for managing media on the device, as shown in Figure 5.
- Verify Media: selecting this button will initiate an FTP connection to the device and WinScript Live will attempt to locate on the device any media that exists in the script. Any files that are not found are noted in the log. If all files are found, the verification passes, and you can rest easy knowing your device is ready for the show.
- Send Media: selecting this button will initiate an FTP connection to the device and WinScript Live will send any media listed in your script that lives on your machine to the selected device.
Connect in Live Mode
To connect in Live Mode to a device on the network, select the device in the Available Devices section, then select the Connect in Live Mode button at the bottom right of the dialog. Connecting in Live Mode allows for more in-depth debugging, making changes and seeing updates immediately, and transferring files to and from the device.
ShowTouch
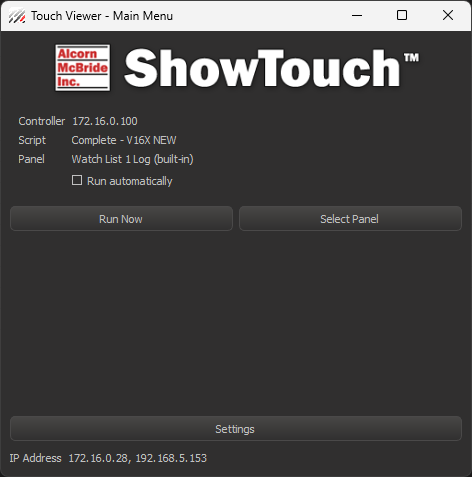
This option opens the Touch Viewer - Main Menu dialog as shown in Figure 6. See our ShowTouch Guide for details.
Product File Creator
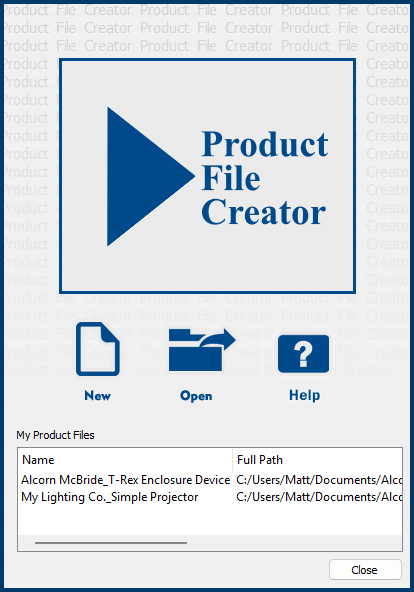
The Product File Creator is a tool for creating Product Files as shown in Figure 7. See our Product File Creator Guide for details.
Product File Tester
The Product File Tester is a tool that allows you to load a Product File and test commands to see what the resulting command sent by the product file would be, as shown in Figure 8.
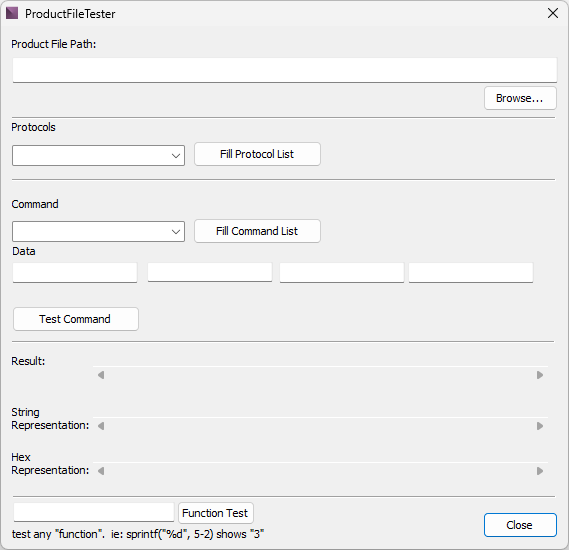
There are two sets of fields in the dialog. The fields above the horizontal line are for setting up a product file and a command to test. The fields below the line show the result of the command.
- Product File Path: select the Browse button to find a product file on your machine, or type the path directly into the field
- Protocols: select the Fill Protocol List button to load the protocols from the selected product file. Once loaded, select the protocol you wish to test from the drop-down menu.
- Command: select the Fill Command List button to load the commands from the selected product file. Once loaded, select the command you wish to test from the drop-down menu.
- Data: insert example data into any of the four fields to see how the data is used in the command
- Test Command Button: lastly, select the Test Command button to populate the result fields listed below
- Result: this field shows the resulting command that is sent from the show controller to the device for which the product file is designed
- String Representation: this field shows the above result in string format, in quotes with all internal quotes escaped
- Hex Representation: this field shows the result as a hex value
- Function Test: enter a function, like the example shown below the field, and select the Function Test button to see the result of that function
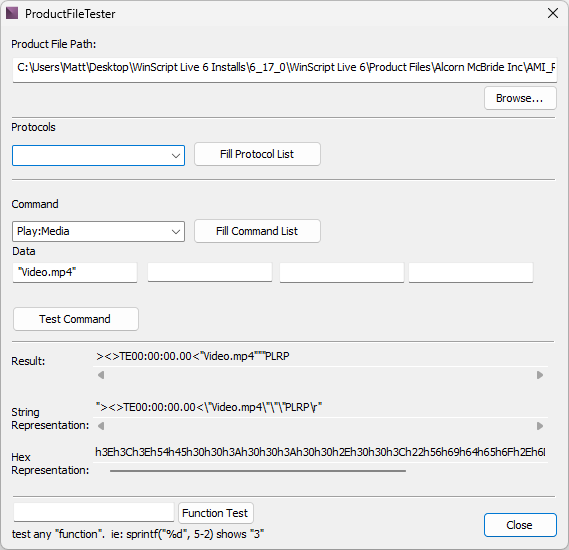
An example is shown in Figure 9 below. The product file is for the RidePlayerX, the protocol is ASCII remote, the command is a "Play:Media Command" with the data "Video.mp4".
Product File Browser
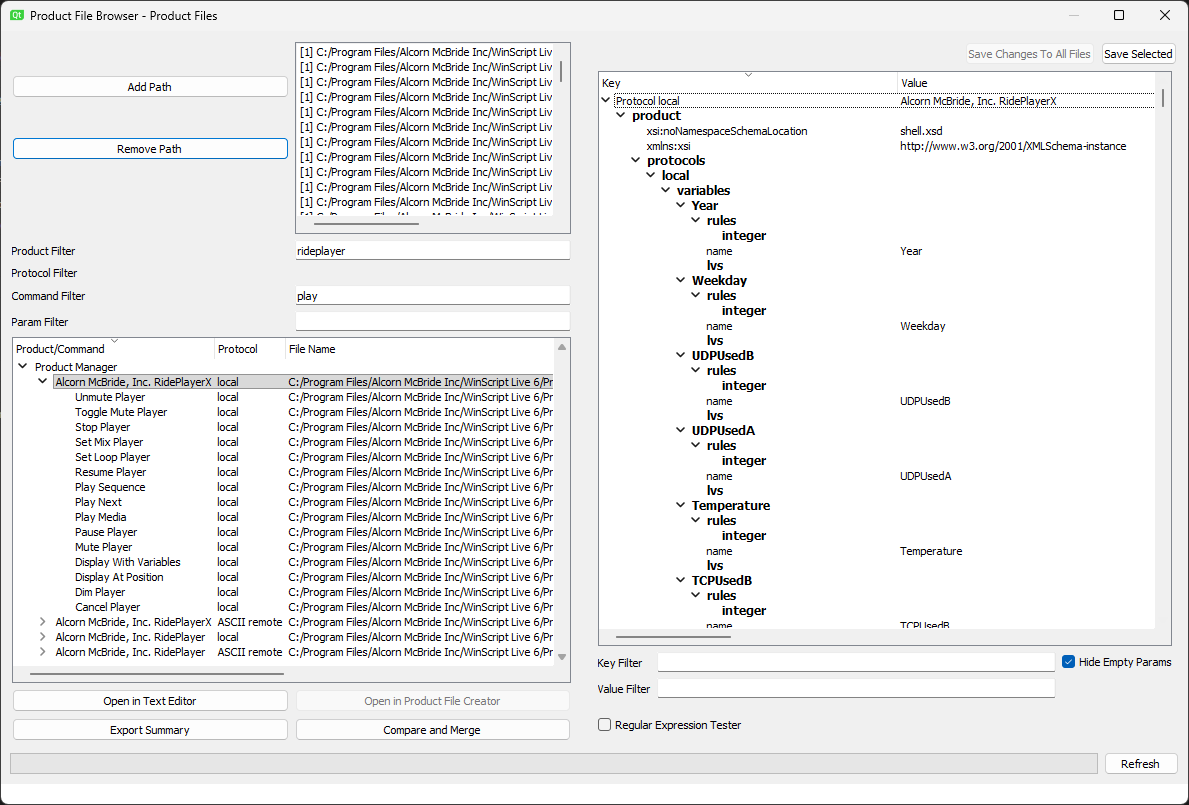
The Product File Browser is a tool that allows you to dive into the inner workings of a product file, as shown in Figure 10.
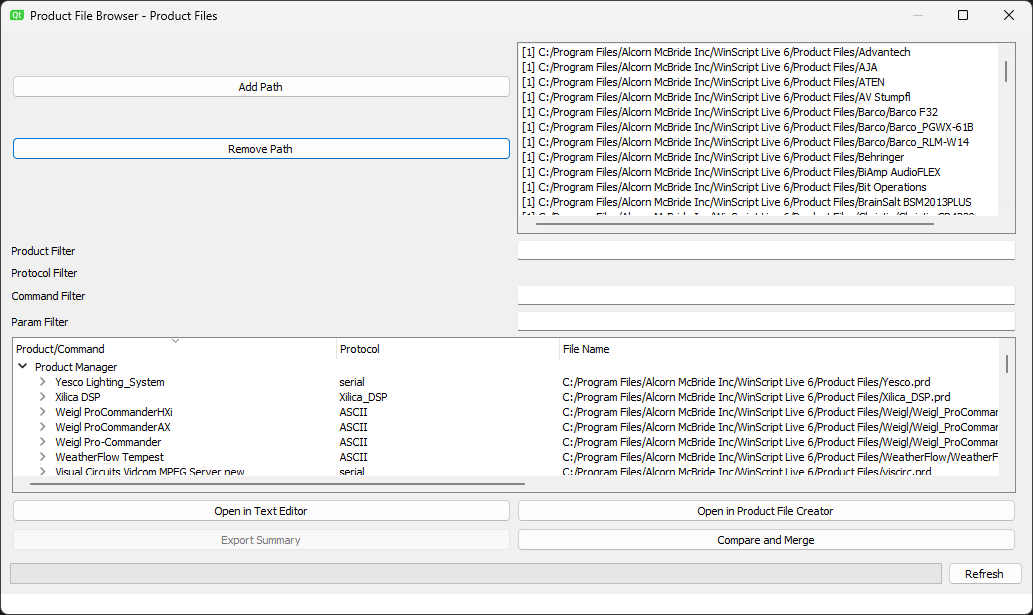
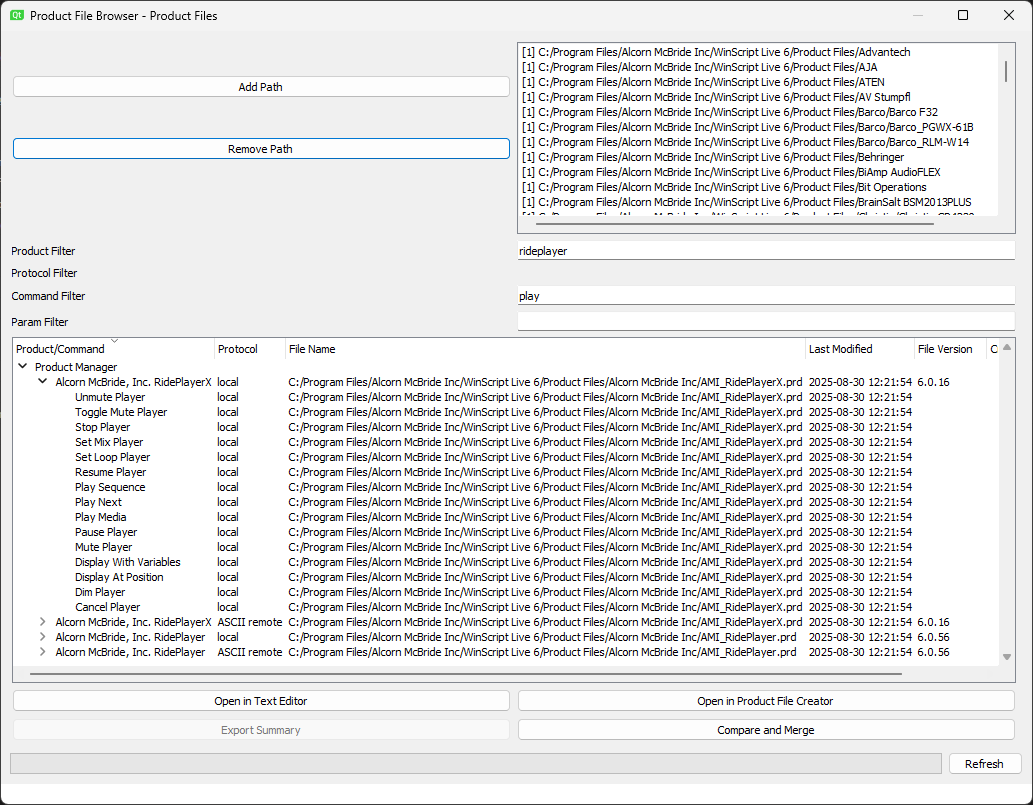
The top half of the dialog allows you to add or remove paths to the list of paths in the right-hand window. Any product files in those directories will appear in the list at the bottom. The fields below this area allow you to filter by product name, commands those product files contain, and parameters those product files use. The example below in Figure 11 shows the list filtered for any products matching "rideplayer" and any commands containing the word "play".
Selecting a product file in the list at the bottom will display a window on the right half of the dialog that shows the entire product file, as shown in Figure 12. You can filter on a Key or a Value below the window to narrow down parts of the product file you wish to view.
Lastly, there are buttons for different operations at the bottom left:
- Open in Text Editor: opens the selected product file in a text editor after selecting a save location
- Open in Product File Creator: opens the selected product file in Product File Creator (if possible)
- Export Summary: exports a summary of the product file to the selected location
- Compare and Merge: select two product files and select this button to open them in a comparison tool installed on your machine
XML Editor
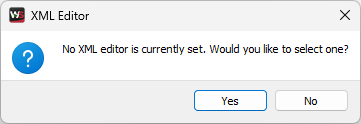
This option allows you to set a link to a specific program for editing XML. If you have not selected an editor, the dialog as shown in Figure 13 will appear. If you have selected one, selecting this option will open that editor.
AMI-Terminal
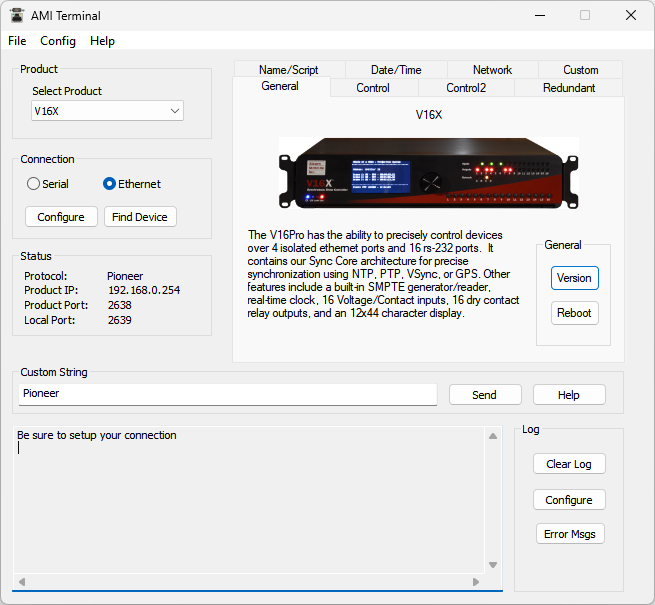
AMI Terminal is a powerful tool that allows you to send commands, set inputs and outputs, control sequences, and so much more for almost all of our products, as shown in Figure 14.
Time Calc
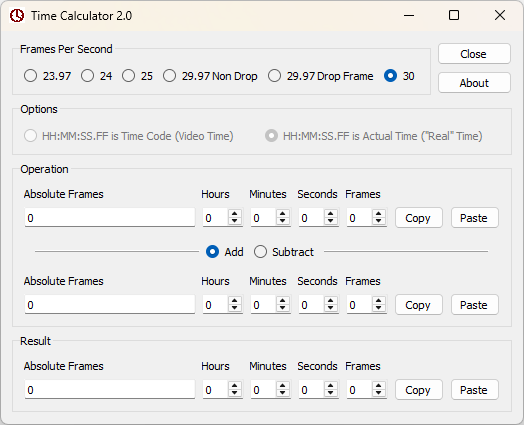
The Time Calculator is a tool that allows you to easily add and subtract hours, minutes, seconds, and frames to a specific time, as shown in Figure 15.
Begin by setting the Frames Per Second at the top. Then, in the Operation section, in the first set of fields, enter the time you wish to add to or subtract from. You can enter either into the Absolute Frames field, or any of the Hours, Minutes, Seconds, or Frames fields, and see how the fields change as you enter data. Then select whether you want to Add or Subtract from this value.
In the second set of fields, enter the amount of time you wish to add or subtract from the above time. As you enter data into these fields, the fields in the Result section will populate and change.
You can use the Copy and Paste buttons next to each set of fields to easily copy/paste values between fields. The Copy buttons act just like copy/paste in Windows, and thus allows you to copy/paste into any other text field in WinScript Live (or outside it!). Likewise, you can use the Paste buttons to paste in a value from outside the Time Calculator or WinScript Live.
Note
Time Calculator 2.0 only supports up to 30 FPS (for now!)
Send File to Device...
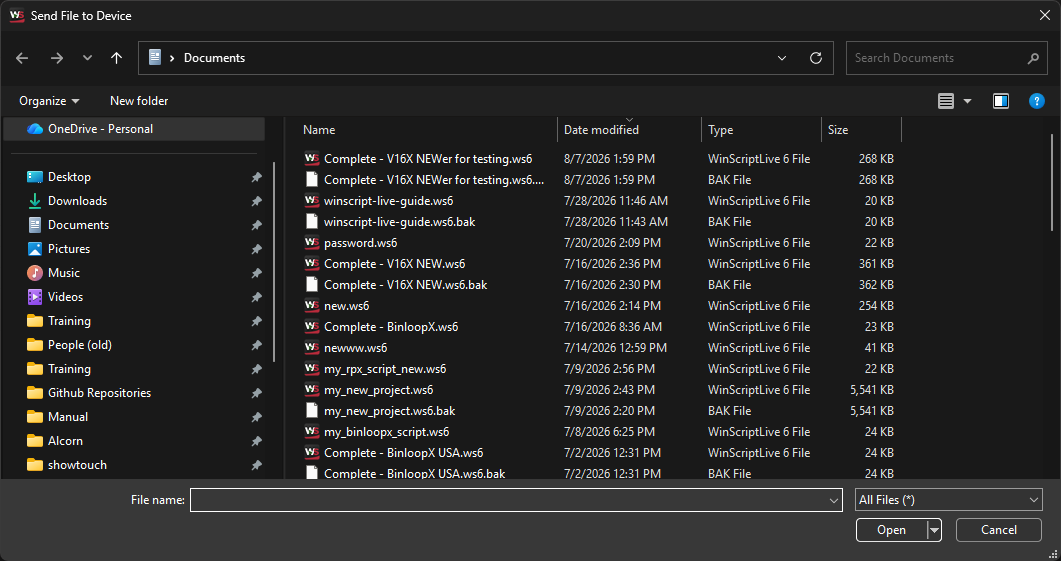
This option allows you to send a file to a device. Selecting this option will first open the Send File to Device dialog, which is a browser on your machine to select a file, as shown in Figure 16. Once a file is selected, the Connection Manager is opened, where a device can be double-clicked to send the selected file to.
Tip
This option allows you to send any kind of file to be stored on the SD card of the targeted device. While you can send a script file as you can through the Connection Manager, you can also send other files to live on the SD card. This option can also be useful if you want to send a script to the SD card for later use without loading it over the currently loaded script.
Create Default Flash Card...
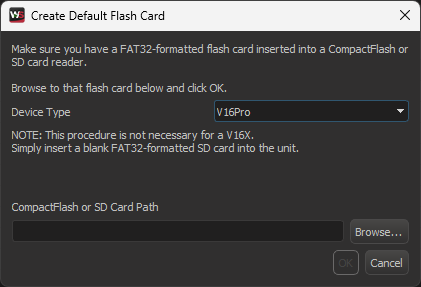
This option allows you to create a default flash card for a V16Pro, V4Pro, or VCore, as shown in Figure 17. Next to Device Type, select the device for which you wish to make the default flash card from the drop-down. In the CompactFlash or SD Card Path field, paste the file path for the card, or select the Browse button to open a file browser and navigate to the card. Lastly, select the OK button to finish the process.
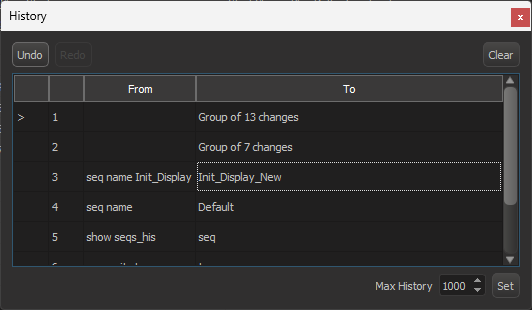
View History...
The History dialog shows the history of edits to the script, as shown in Figure 18. This dialog includes buttons for Undo and Redo, and below that, lists each edit to the script. Simple edits have a "from" value and a "to" value to show before and after, and edits to things like triggers or more complex features are shown simply as a group of changes. The arrow in the first column indicates the current state of the history. If you undo an edit, the arrow moves down, and if you redo an edit, the arrow will move up. Lastly, you can set a Max History using the field at the bottom right. This will limit the number of edits tracked.