Remote Monitoring
One powerful feature of the RideAmp product line is the ability for the RidePlayer to remotely monitor the devices via WinScript Live 6. Below are step-by-step instructions on how to configure a RideAmp-25H or RideAmp-250Q to be monitored by a RidePlayer.
- Requirements:
- Dante Controller
- WinScript Live 6
- RidePlayer
- RideAmp-25H / 250Q
Configuring Dante
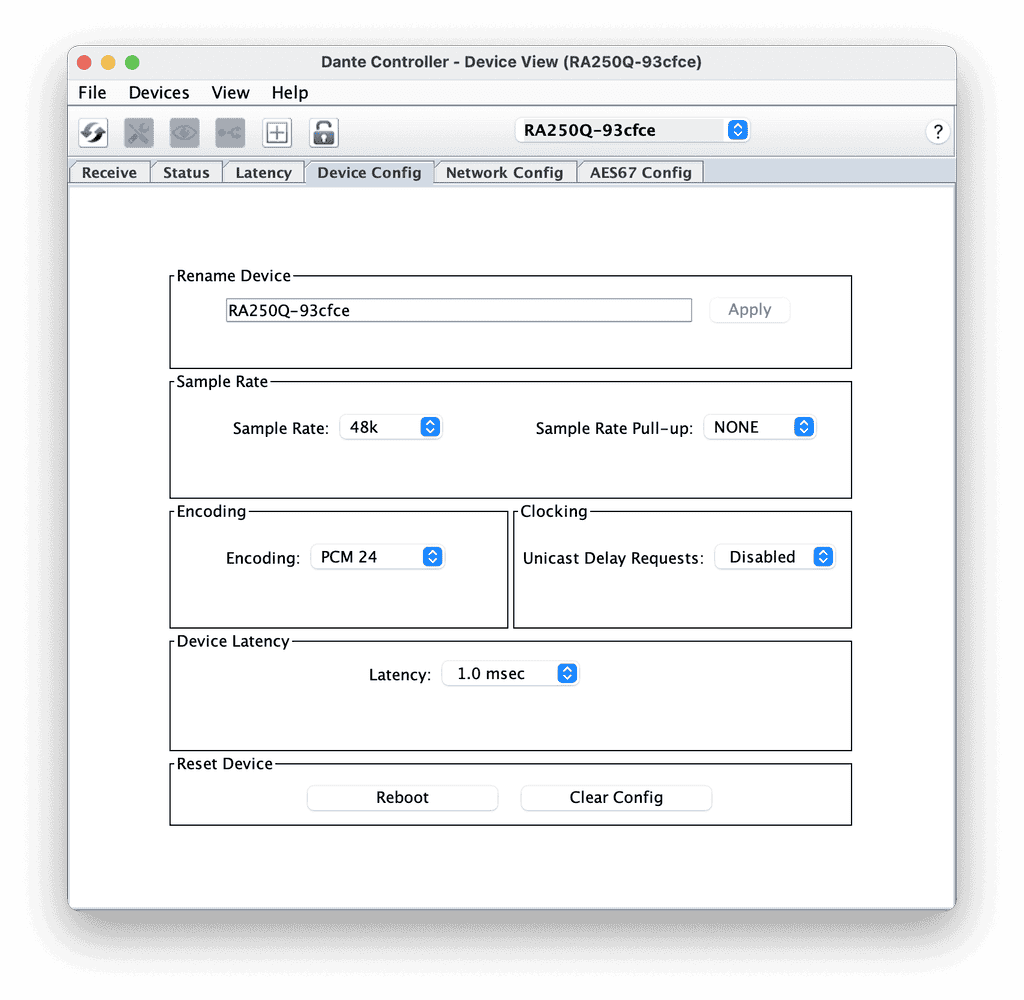
The first step to set up monitoring of a RideAmp is to configure the unit(s) using Dante Controller.
Using Dante Controller, you will give your RideAmp units a unique name in the Device Config window. This name will be used by the RidePlayer to discover the unit on the Dante network, so it is important to keep track of the device names.
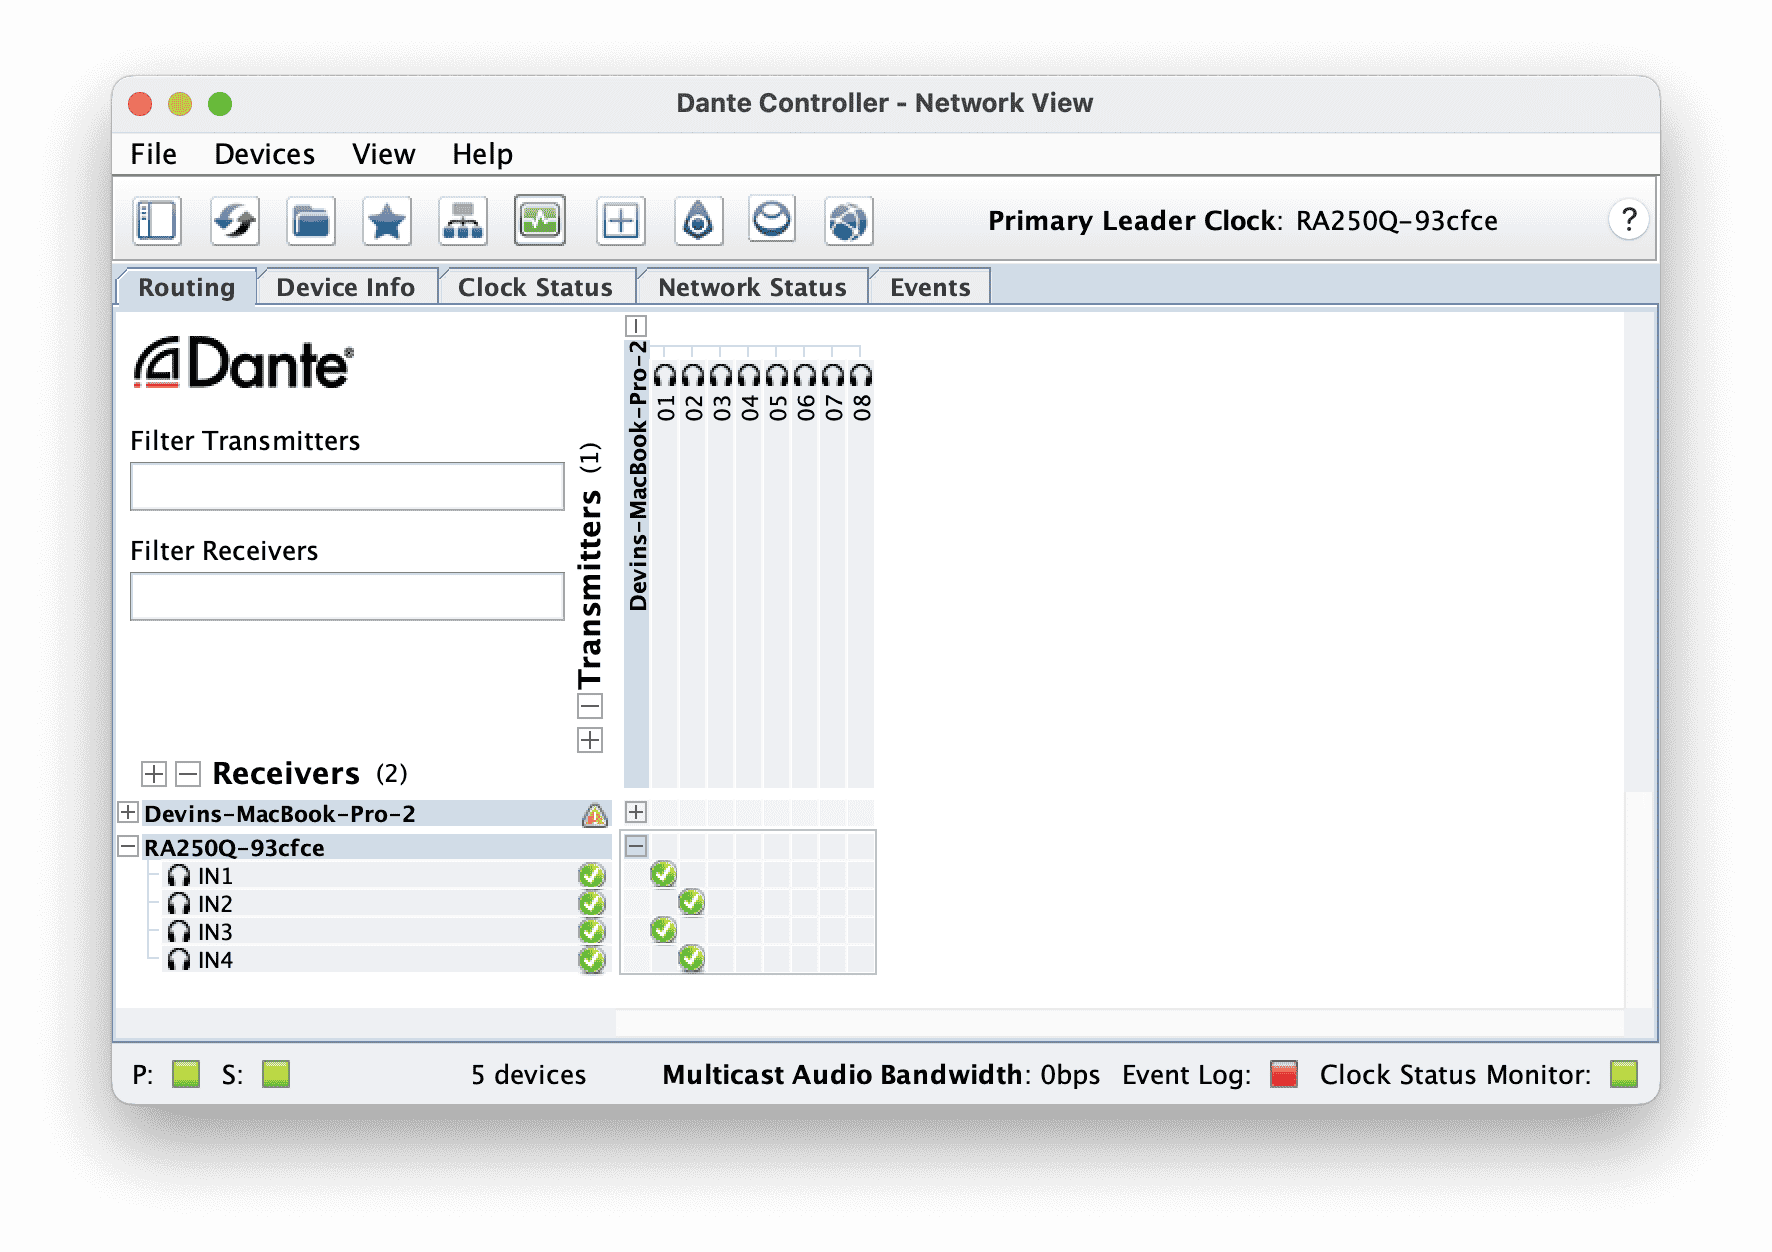
Once the units are named, Dante routes should be established with the RidePlayer so that audio will be passed from the RidePlayer output to the corresponding RideAmp inputs.
Adding RideAmp to RidePlayer
Now, in WinScript Live 6, you will need to add the RideAmp to your RidePlayer's script file.
In the Devices window, add a New device, and configure it for an Alcorn RideAmp-25H or RideAmp-250Q. Make sure to name the RideAmp the same name as what was previously configured in Dante Controller.
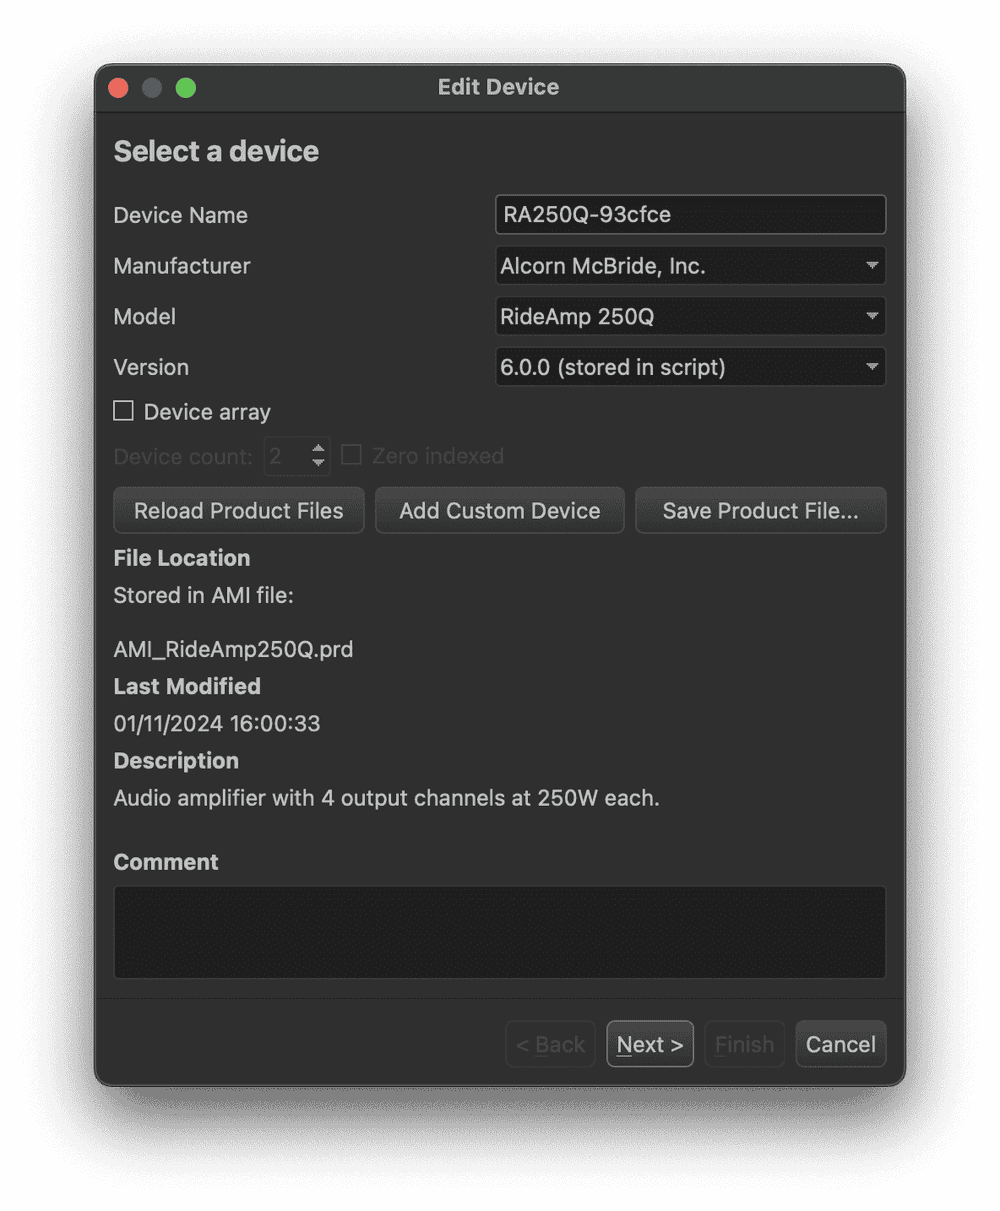
You will leave the default network settings for the RideAmp, as the RidePlayer will automatically discover the unit(s) on the network using their Dante device name.

Monitoring the RideAmp
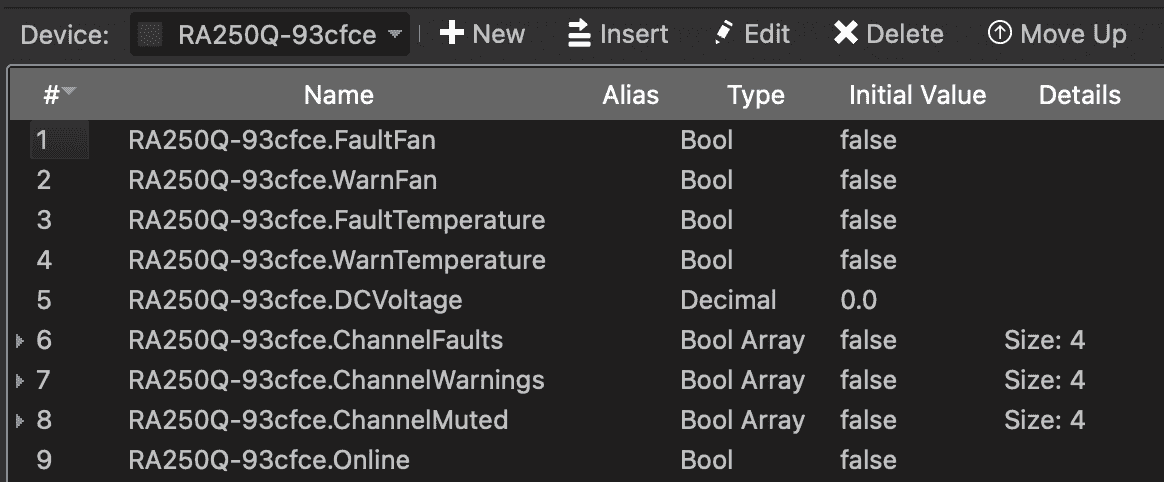
When the RideAmp is added to your RidePlayer script, Device Variables are automatically generated. These variables allow you to monitor the status of the RideAmp, specifically:
-
Device Variables
- Fan Faults
- Fan Warnings
- Temperature Faults
- Temperature Warnings
- Input Voltage
- Audio Channel Faults
- Audio Channel Warnings
- Audio Channel Mutes
- Audio Channel Dante Routed
- Audio Channel Dante Audio Present
- RideAmp Status (Online/Offline)