Network Audio
Several of our audio-enabled products utilize Dante or AES67 network audio to output audio signals. This section is a basic overview of how to configure and route these audio signals using Audinate's Dante Controller software. This software is a free download available from Audinate's website (http://www.audinate.com).
Connecting the Audio Network
First, we have to make sure your audio network is connected properly. Audio network architecture can vary wildly, but here are some common examples using our products.
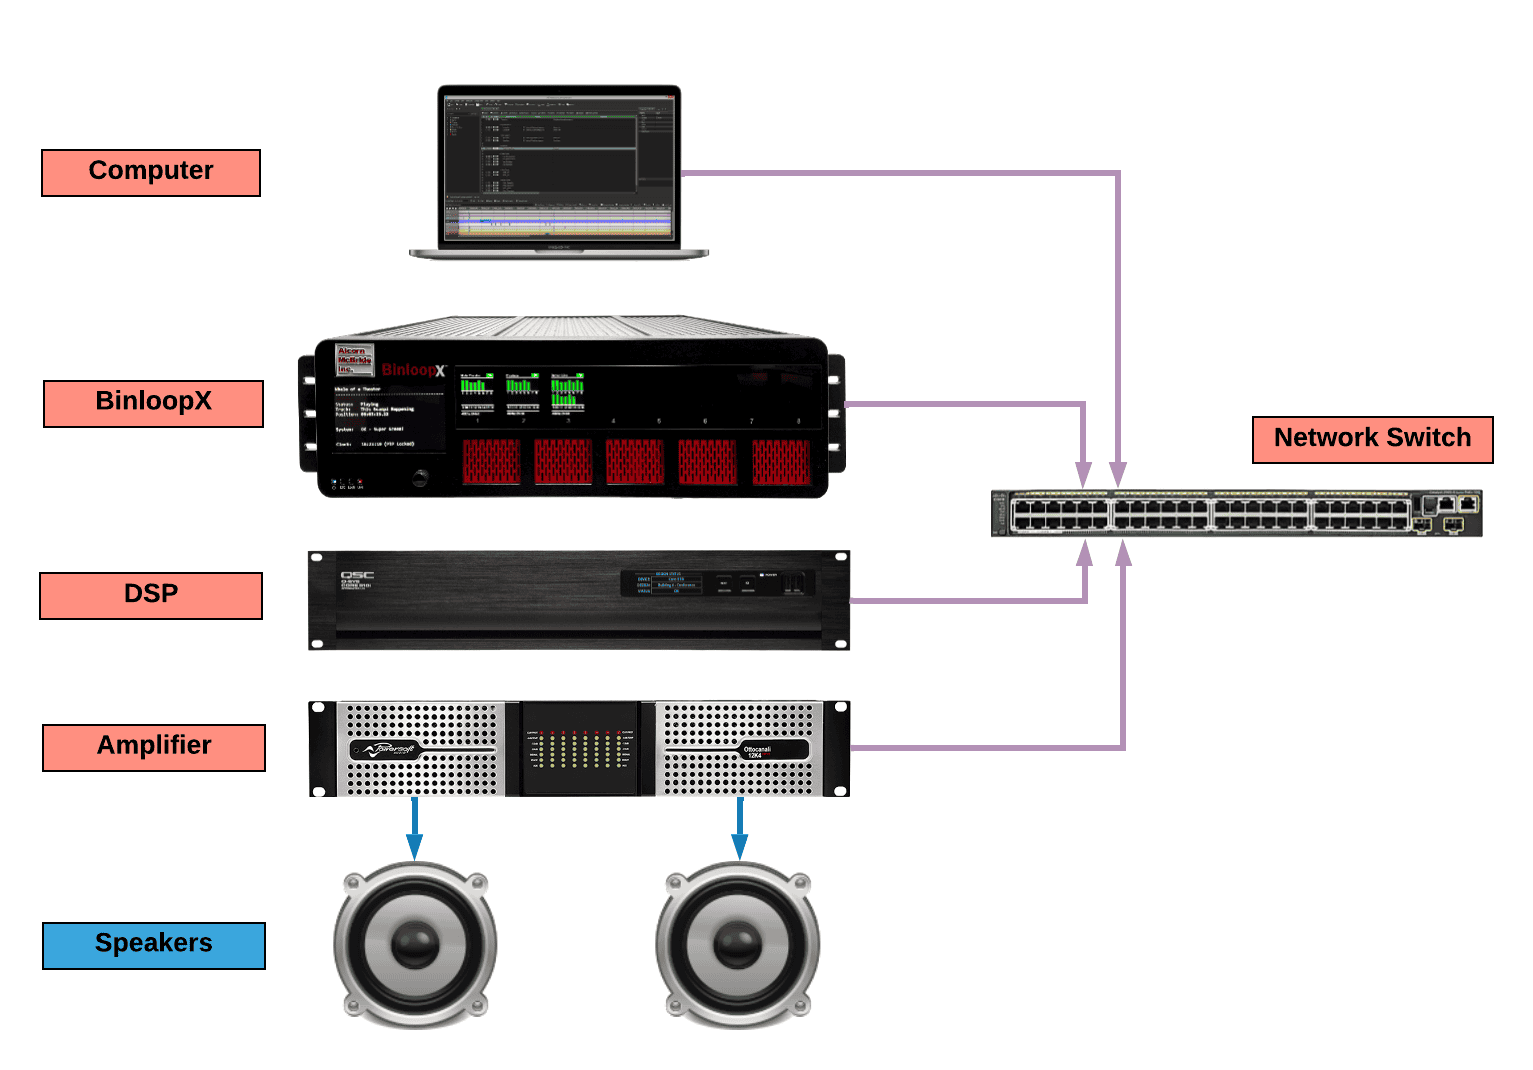
Here is a typical BinloopX BX-16A architecture:
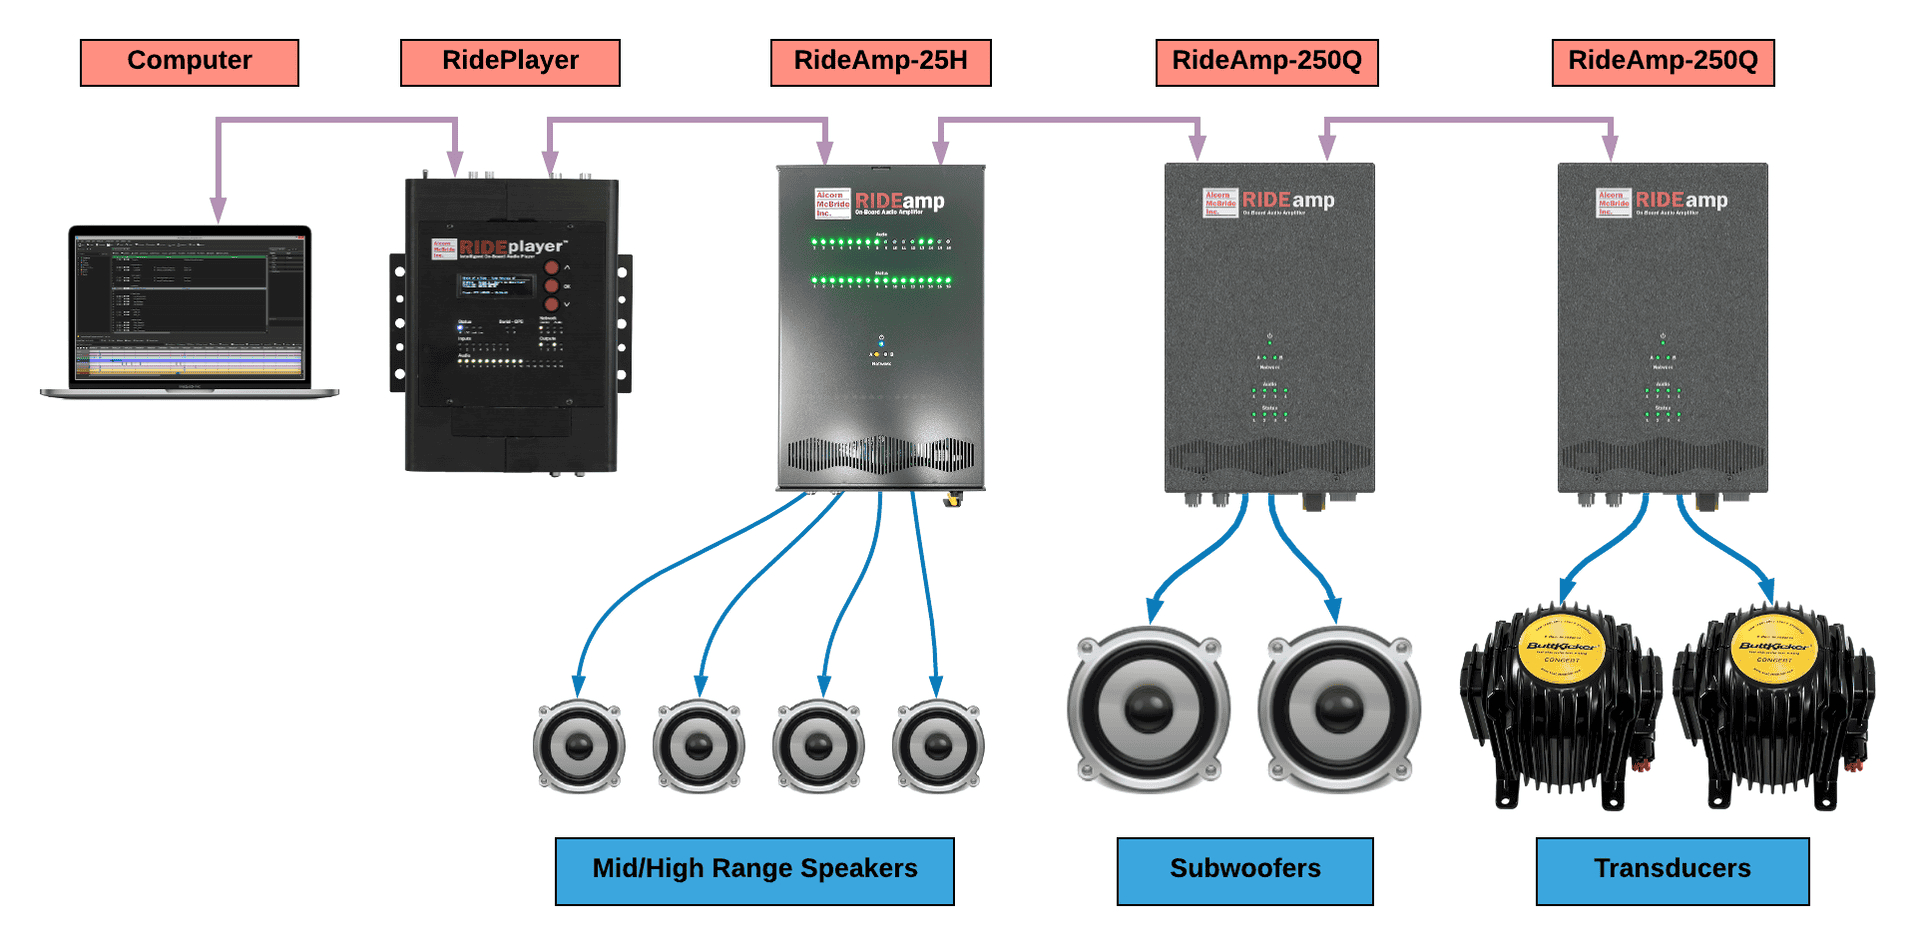
Here is a typical on-board audio architecture leveraging RidePlayer and
our companion RideAmp products.
Your computer should be connected to the audio network using a wired network connection, either through a dedicated wired Ethernet port or a wired Ethernet dongle.
The BinloopX is connected using one of the RJ45 ports labeled Network Audio:
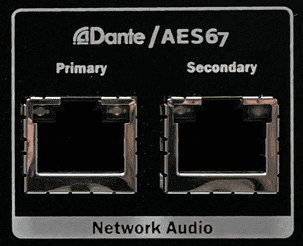
The RidePlayer and RideAmp units are connected using one of the M12 X-Coded ports labeled Network Audio:

NOTE: If you are using a managed network switch, it is absolutely critical to understand that Dante and AES67 are distributed using multicast traffic. Not only do you need to make sure your network hardware is properly configured to allow multicast traffic to pass between these devices, you also need to consider whether or not you're allowing it to pass to other networks or VLANs. More information on configuring managed switches can be found here on Audinate's website.
Configuring Network Audio Addresses
A good first step is configuring all of your network audio devices with compatible network settings. In other words, getting them all on the same subnet so that they can actually stream multicast data to one another.
When you launch the Dante Controller software, it will be able to scan the network for network audio devices. The network addresses can be configured by selecting the device and then browsing to the Network Config tab. One you have configured these settings, be sure to click the Reboot button to ensure the new settings are applied.
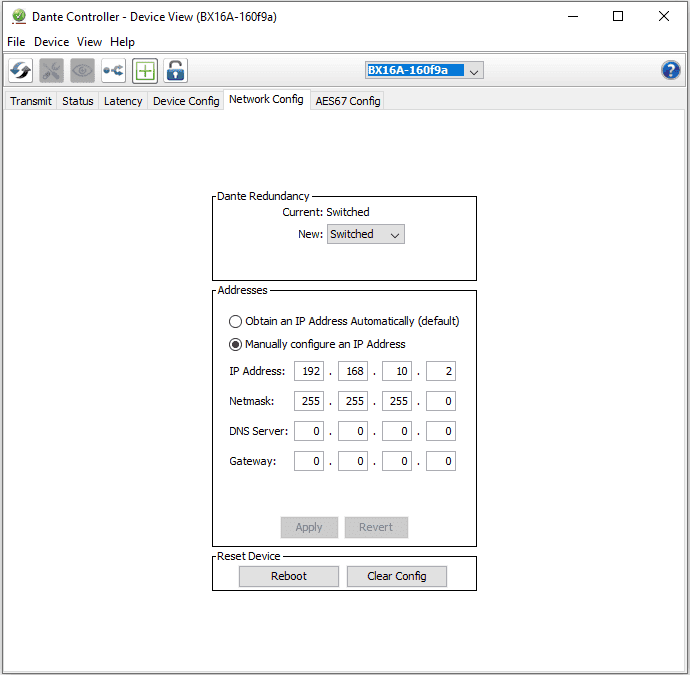
NOTE: If the device you are trying to configure is on a different subnet, it may be necessary to change the IP address of your computer to access these settings. To aid with this, Dante Controller will usually discover the device and display it's IP address when you select the device on the Device Info tab*
Configuring Network Audio Settings
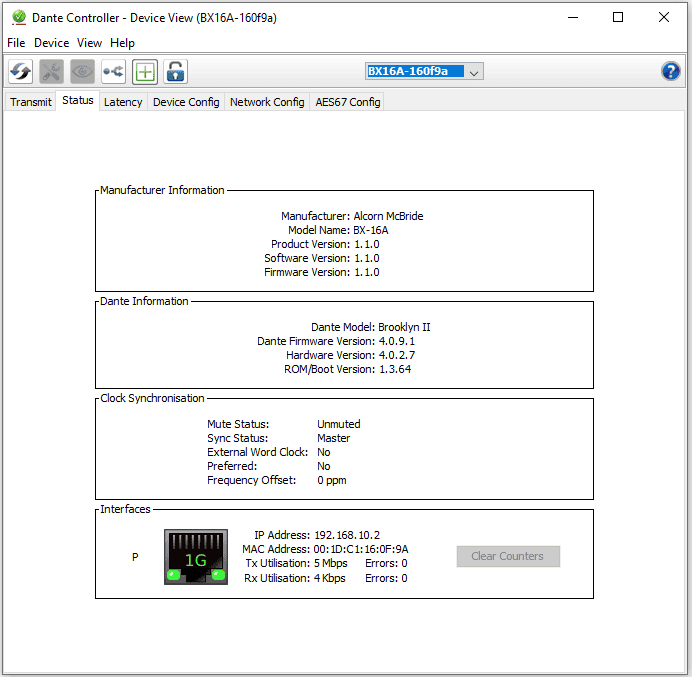
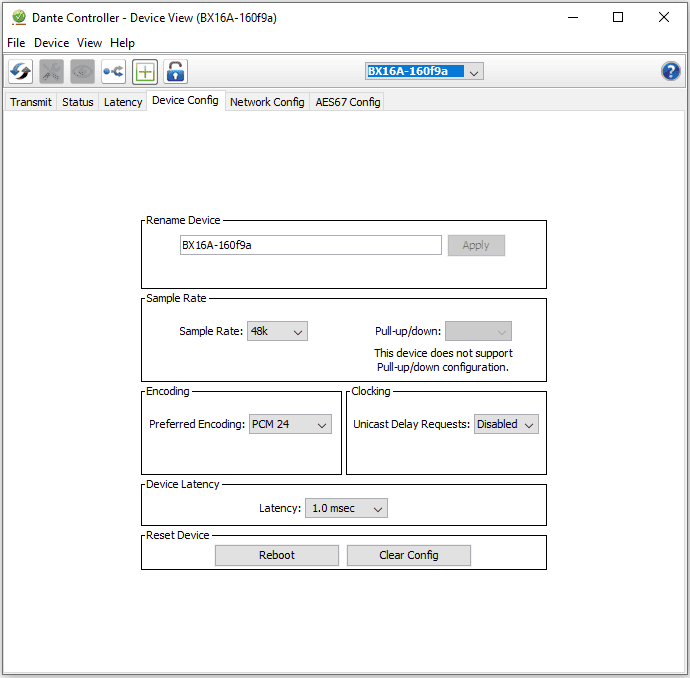
Once the network addresses are configured properly, you will have full visibility into the network audio settings of the device. Using screens like the ones shown below, you have the ability to configure things like the Device name of the module, the sample rate, and other detailed settings specific to the network audio interface.
Routing Audio Outputs
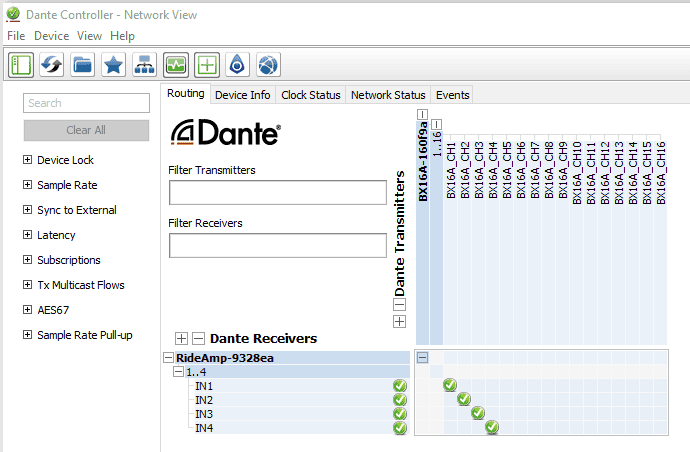
Once the basic setup is complete, routing the audio outputs of the network audio interface is a piece of cake. Simply connect the Transmitters of the source device (i.e. RidePlayer or BinloopX) to the Receivers of your destination device (i.e. RideAmp, DSP, etc.) and the audio signal will flow!
For more information on the more advanced features of Dante and AES67 audio distribution, Audinate periodically offers training classes.